KOI POND from Cross StitchHappy. A free design available here.
I fell in love with this design the minute I saw it and knew I had to stitch it. I also had the perfect piece of fabric in my stash which had been haunting me for many years. When I began I had no idea that it was going to evolve into a stitcher's wallet but I wanted to use as much of the fabric as possible so the project g-r-e-w and g-r-e-w.
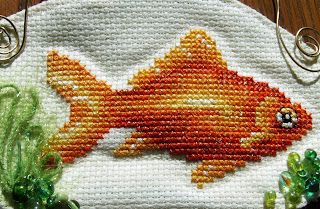
More about this particular piece of fabric. It was originally purchased with a specific design in mind but I didn't enjoy stitching on it so I ripped out what little I had started and put it aside. The fabric is not even (translation - uneven) which I didn't realize until all stitching was completed. The graphed design is square, however, the stitched design is not! Surprise!! It is longer than it is wide! (Lesson learned - beware of older fabrics at bottom of fabric stash that are unmarked and unlabeled.) I believe it is 22 count but for Koi Pond I stitched over 2 threads for 11 count. The DMC colors suggested were used with Kreinik metallics added for shimmer.
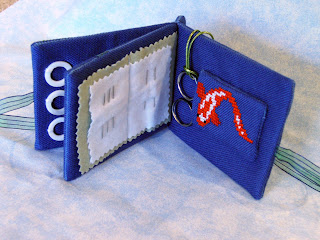
The wallet has a front and back cover with one inside page and is closed with a ribbon tie.
A scissor pocket is on the inside back cover, thread rings are on the inside front cover, felt needle pages are on the inside, and a separate scissor fob is included.
Here’s a picture of the page inside. I knew I wanted this extra page but had no idea how to attach it so I enclosed its edge within the front and back pages. (I tapered the bound edges of the inside page to reduce some bulk. ) Then I had the dilemma of what to do with this bulky edge so I added initials and the year. See what I mean by "evolved"?
.jpg)
The scissor pocket shows a repeat of the koi.
An extra piece of ribbon was added to gather thread dangling from the thread rings (hard to see in the photo).
Sizes are approximate: Closed: 3 ½” x 5”. This includes includes ½” on the edge for initials & year. Open: 9” x 3 ½”.
Sizes are approximate: Closed: 3 ½” x 5”. This includes includes ½” on the edge for initials & year. Open: 9” x 3 ½”.
.jpg)
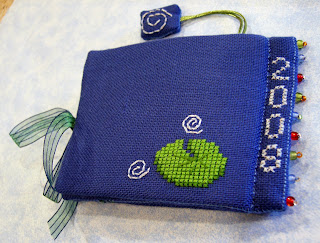
A lily pad was repeated on on the back and the water swirl was a perfect design for the scissor fob.
.jpg)
Here’s a closeup of the beads on the spine. I was thinking 'fish scales' when I added the beads.
.jpg)
I've had requests for a tutorial for this since it appeared on Cross Stitch Happy's site. I've tried to create one (after-the-fact is very difficult) but my attempts are very amateurish and unsuccessful, at least for publication. I did use the backstitch/whipstitch biscornu method for finishing. If I were to do this today I would stitch the front and back patterns, initials and year on one long piece of fabric. Since I really didn't know what I was doing everything is on a separate piece of fabric which made for a lot of extra and unnecessary work in sewing everything together.
If you decide to create something like this, please learn from my mistakes and it's a lot easier if you have a definite plan in mind before starting.
But sometimes the most fun is in the discovery.


